If you are very lucky & your motherboard Sata/IDE chipset is identical or very similar it may boot & you will just have to install all the new motherboard drivers.
But more often than not, when you have fitted a new motherboard to your windows 7 PC, it will either blue screen or just restart.
Read on, for how to repair your Windows 7 installation so you can get it working again.
First off you will need these items:
1, Windows 7 installation disc
2, A USB thumb drive
3, Motherboard drivers
4, Access to another computer
It is probably easier to download the SATA/AHCI drivers than to try to find the right folder on the motherboard cd.
Here we have downloaded the motherboard drivers for a Gigabyte GA-G31M-S2L
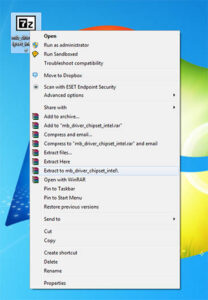
First extract these drivers to your desktop
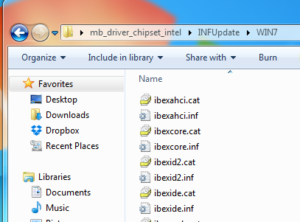
Next you will need to browse to the driver folder & find the relevant drivers, ours was in a folder called Win7
Copy this Win7 folder to the root of a USB thumb drive.
Now plug the thumb drive into the non booting PC, put the Windows 7 install CD into the DVD Drive & boot from it.
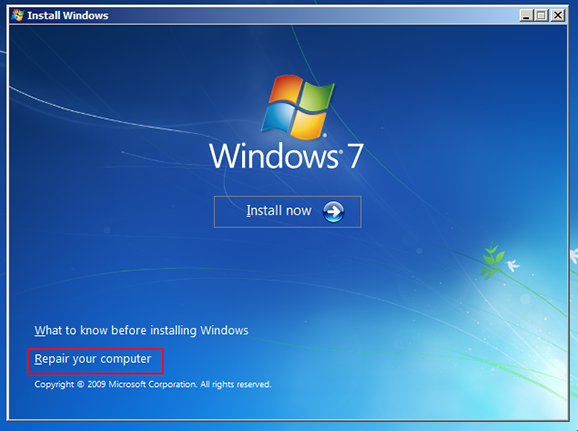
Once you have the screen (above),then click next.

Click Repair your computer (Above)
It will then show you the C: drive & it may automatically try & repair the drive, let it finish & reboot, if it does not boot into windows then boot of the Windows DVD again and click Use recovery tools (below)
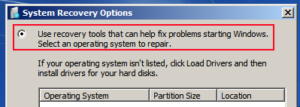
Click on Command Prompt (below)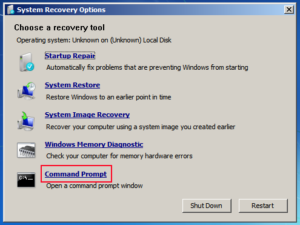
Bare in mind that your boot drive is nearly always c: but maybe d: if you have a recovery partition
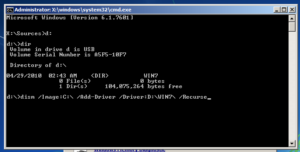
Type d: press enter then type dir and enter, carry on up the alphabet until you find the drive letter for your USB drive, once found type:
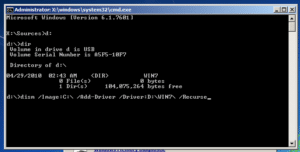
dism /image:C:\ /add-driver /Driver:D:\WIN7 /recurse
Then press the Enter Key (as above, we are assuming that our windows partition is C: and our USB drive is D: yours maybe different, change as needed)
if you have typed this right it will install the drivers from the USB drive into your windows installation.
Once finished click close & reboot, it may take a few minutes to boot as it sorts all the drivers out.
Sadly this didnt work for me but still looks like a really promising way to fix it. Im just gonna get a PS2 mouse and see if that works.